

Focus & Spin: Design Your Own Brainwave Display

This hands-on STEM course is designed to teach students how to build a brain-controlled attention dial using Neuromaker BCI brainband, Arduino UNO, and servo motors. The goal was to make neuroscience tangible,which means students don't just learn about brain-computer interfaces, they actually build one that responds to their focus in real time.
Audience: Middle to high school students (ages 12-18) and teachers
Responsibilities: Content design, Instructional Design, eLearning Development, Action Mapping, and Visual Design
Tools Used: Articulate Rise 360, Canva, Arduino IDE, Video and Gif Editing Tools, Sora
The Problem
Brain-computer interfaces are usually taught as abstract theory. Students can't visualize how brain activity actually controls physical systems. Even worse, the project spans multiple technical domains—neuroscience, electronics, programming, and design—which can quickly overwhelm learners if not properly structured.
The Solution
I designed a three-stage learning progression aligned with Bloom's Taxonomy, moving from foundational knowledge to hands-on application to creative problem-solving. This isn't just about teaching facts—it's about building engineering thinking.
Project Overview
-
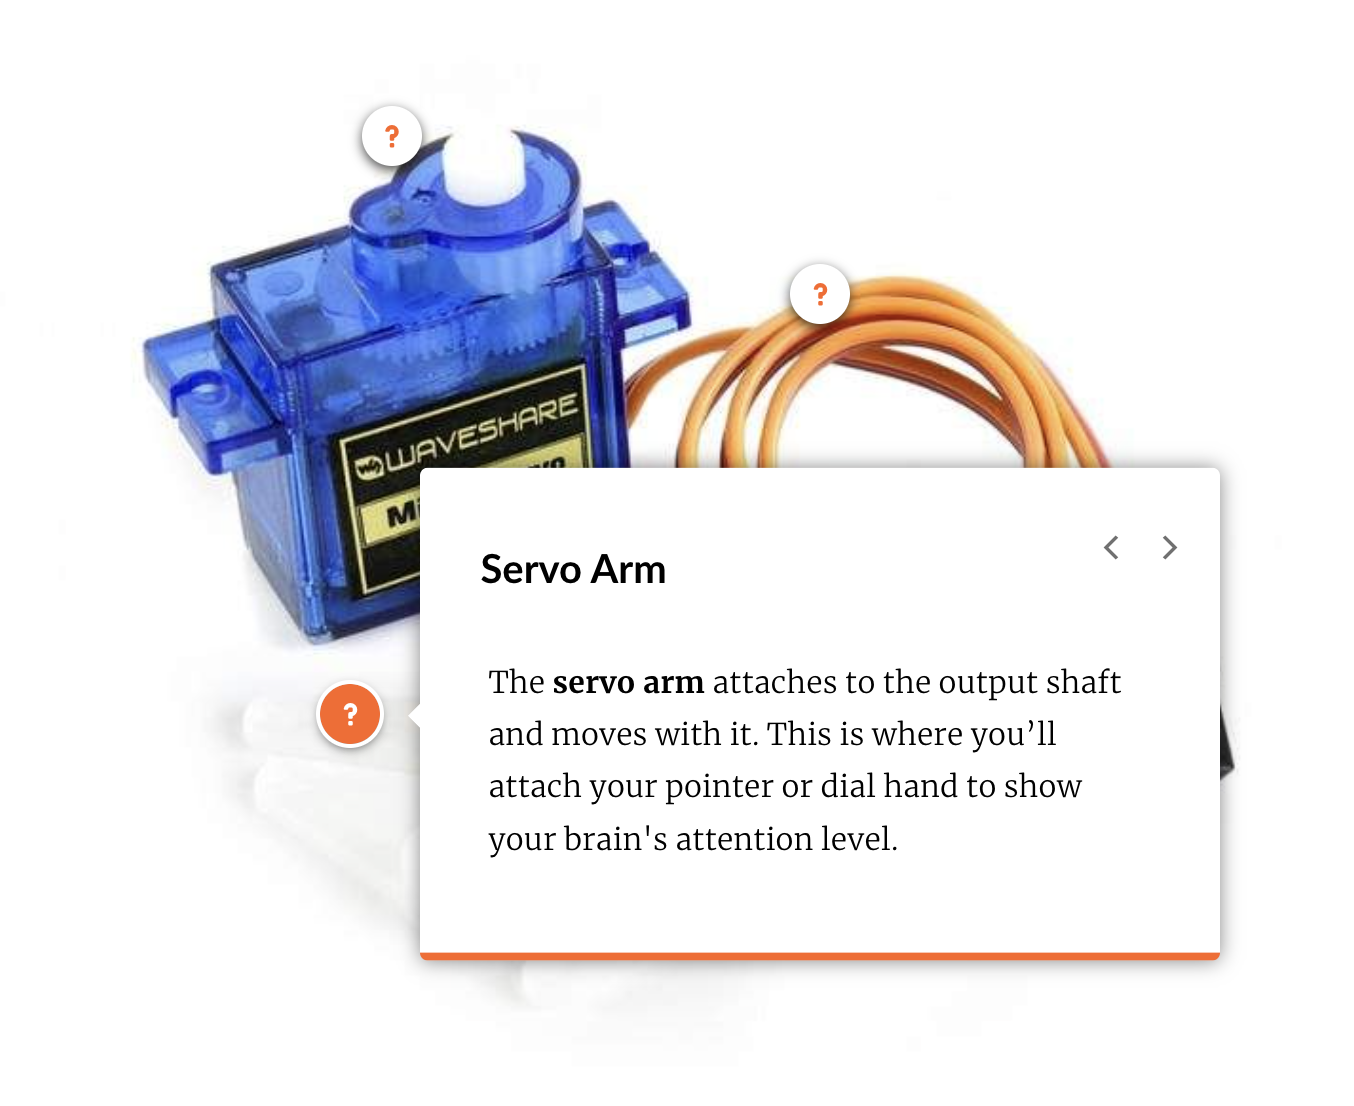
Activity 1: Knowledge & Understanding (Meet the Servo)
Students learn what a servo motor is, how it works, and why it's used for brain control. They identify components and understand the function of each wire before touching any hardware
-
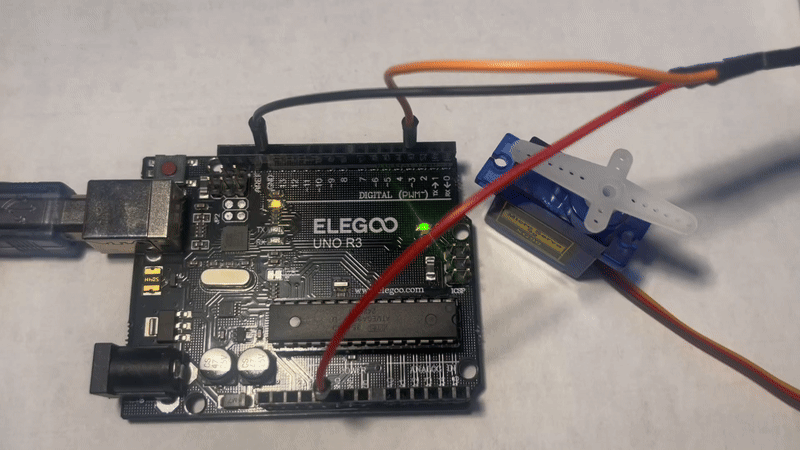
Activity 2: Application & Analysis (Build and Code)
Students apply their knowledge by physically wiring the circuit, uploading Arduino code, and connecting the BCI system. They see the cause-and-effect relationship between brain signals and motor movement.
-
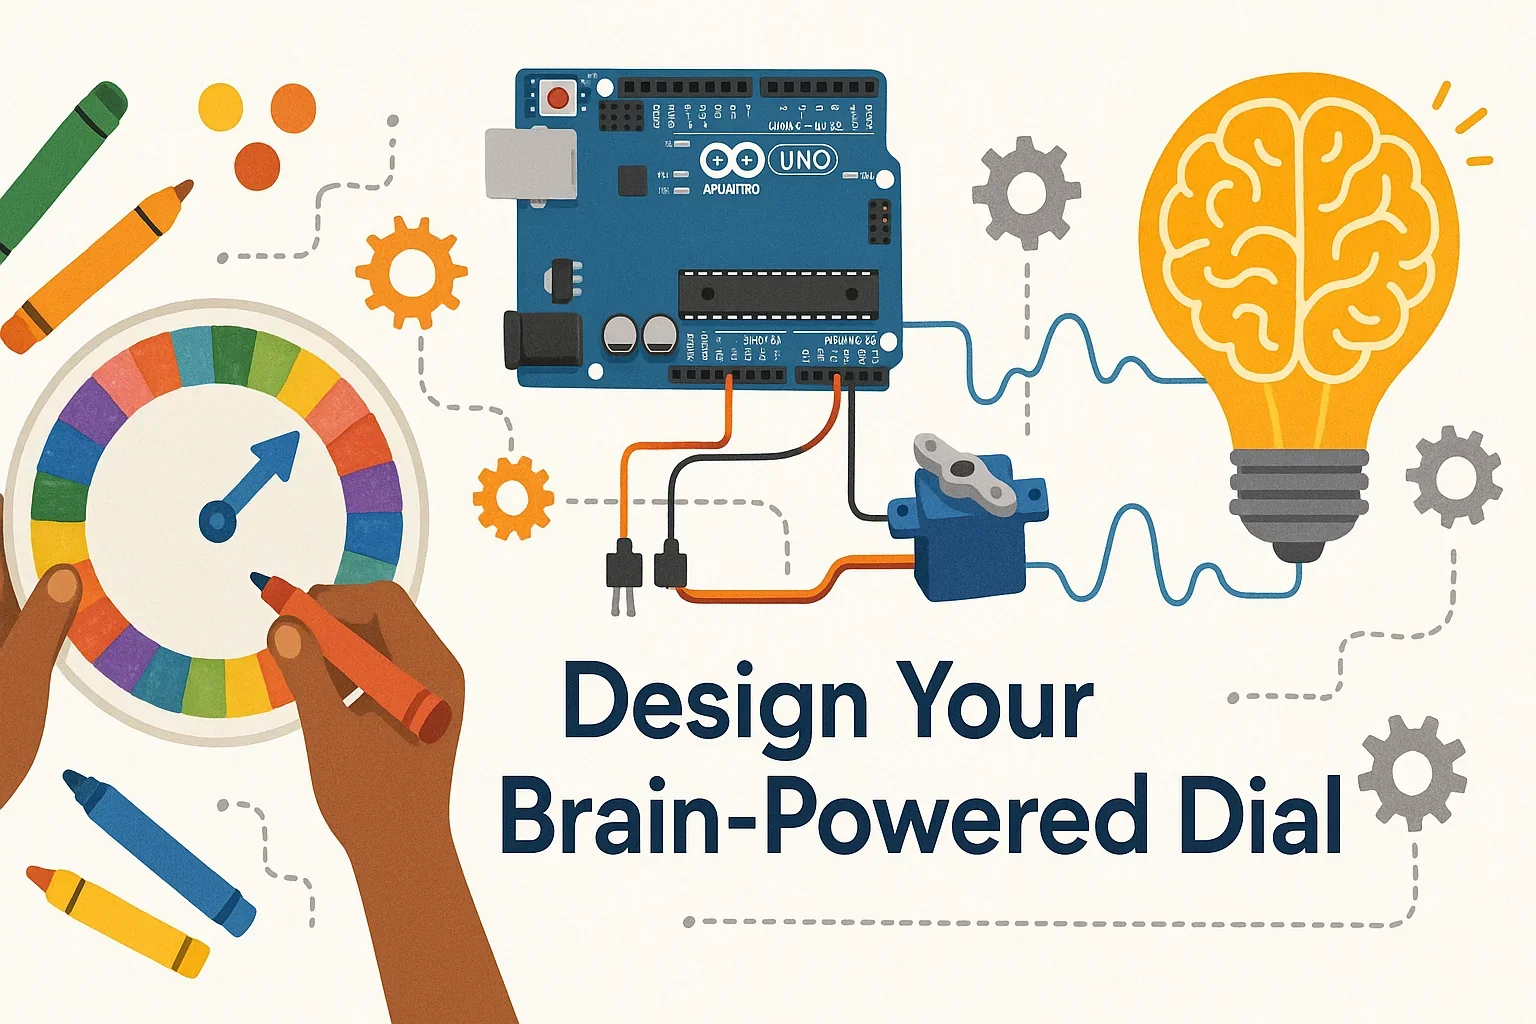
Activity 3: Synthesis & Creation (Design Your Dial)
Students design their own data visualization, making creative decisions about how to represent attention levels. This is where engineering thinking happens—they're solving a real design problem with constraints and trade-offs.

Key Design Strategies
1. Scaffolding from Knowledge to Practice to Creation
This progression reflects our belief that knowledge serves practical application. Students aren't memorizing for a test—they're building toward a working prototype they designed themselves.
I used multiple scaffolding methods: visual supports (labeled photos, color-coded diagrams, interactive hotspots), demonstration videos showing real-time servo response, embedded knowledge checks, design templates, and progressive locks.
2. Prioritizing Conceptual Understanding Over Coding
My primary goal was teaching BCI theory and cultivating interest, not programming syntax. Coding creates unnecessary cognitive load at this stage. I provided working Arduino code that students upload and run, letting them focus on understanding the cause-and-effect relationship between brain signals and motor movement.
3. Creative Application and Engineering Thinking
The final activity shifts from following instructions to independent design decisions. Students create their own attention dial, solving a real design problem with constraints (180-degree servo range) and trade-offs (meaningful attention zone divisions). The project naturally connects to other subjects: art in dial design, biology in understanding attention, mathematics in data mapping.

Reflections and Takeaways
The scaffolding worked—students moved naturally through understanding, application, and creation without overwhelm. Creative personalization gave genuine ownership and increased engagement.
What I'd Improve:
Connect the mechanics to real-world technologies. The BCI attention-sensing powers focus-tracking study apps and smart classroom engagement monitors. Servo motor control appears in prosthetic limbs responding to neural signals.
This connection shows students their project isn't isolated—it's foundational for emerging technologies.